
Usage - Creating a Zoom Video Appointment Type
Once you have successfully installed Zoom for your FlightPath Profile, you will now want to create an appointment type which makes use of it.
This means that when a student schedules that type of appointment, a Zoom meeting is automatically created on your account, and instructions for connecting are sent to both you and the student. An item will also appear on FlightPath's appointment calendar for both you and the student.
Create a New Zoom Appointment Type
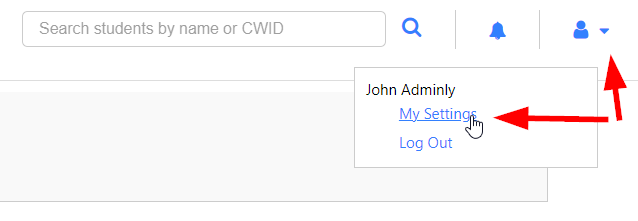
Begin by accessing your "My Settings" screen, by clicking on the user icon in the top-right of the page:
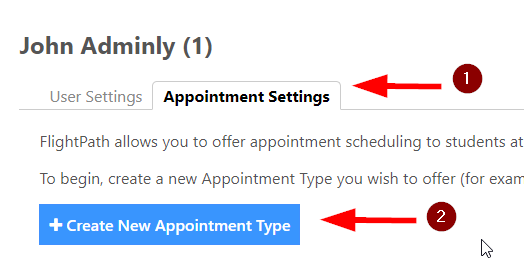
Navigate to the "Appointment Settings" tab, and click the "Create New Appointment Type" button:
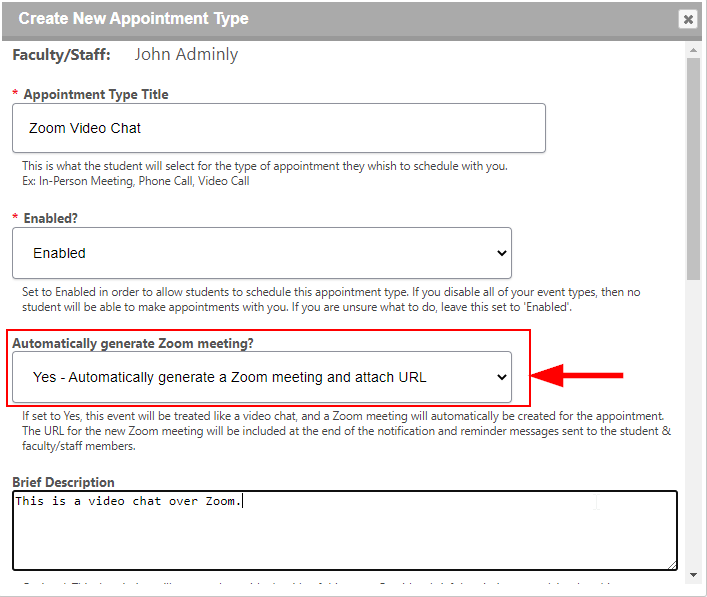
A popup will open, allowing you to specify the details of the appointment type. For example, it's name, a short description, etc. Most importantly, select "Yes" to the question "Automatically generate Zoom meeting?":
Once you press "Save", you will see that a new appointment type has been created. From the student's perspective, they will now see this new appointment type as an option when scheduling an appointment with you, as seen below:
