
Installing Zoom for your FlightPath Profile
Connecting Zoom to your FlightPath profile is easy, and allows students to schedule appointments with you which automatically create Zoom meetings.
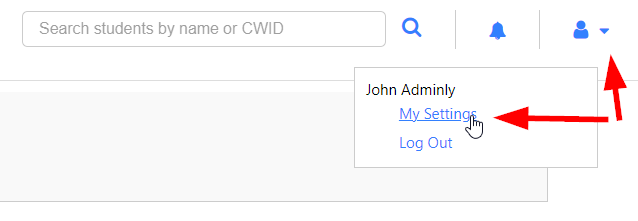
Step One
Log into your FlightPath Academics web application, and click the "User" icon, then "My Settings" in the upper-right corner of the page:
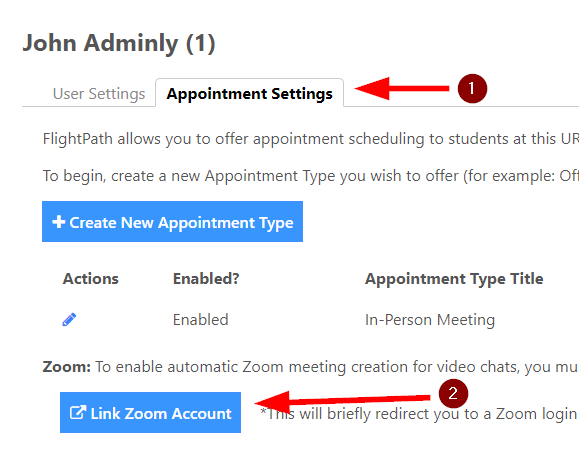
Step Two
Navigate to the "Appointment Settings" tab, and click the button "Link Zoom Account":
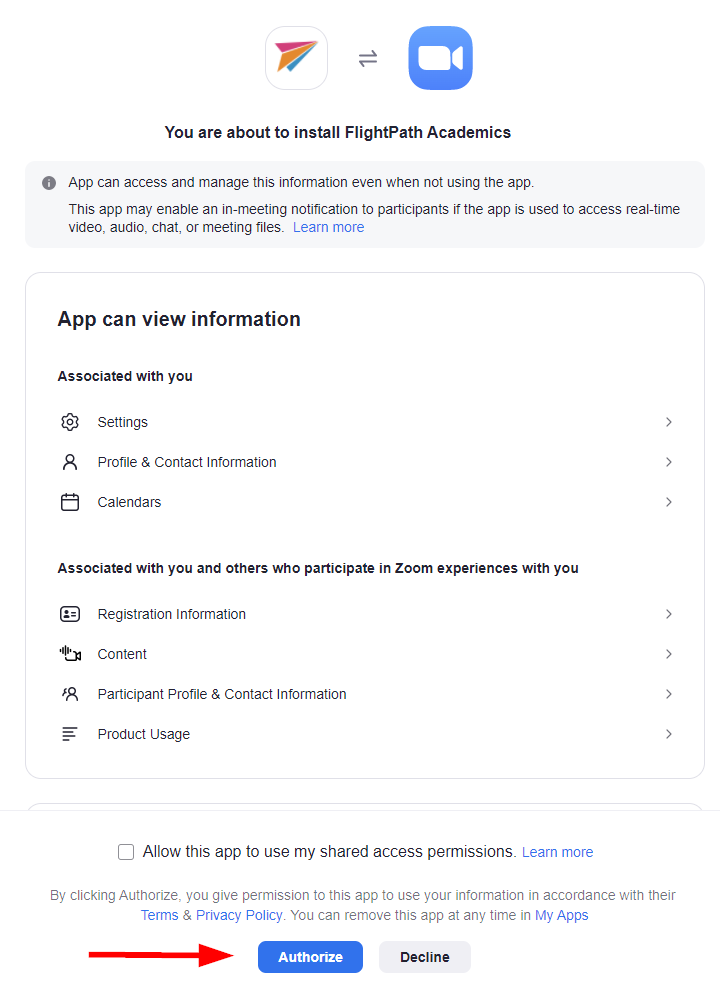
Step Three
You will be redirected to a Zoom login screen. Enter your normal credentials. After that, you will see a screen asking you to approve the the installation of the FlightPath Academics Zoom app. The screen will show the level of access FlightPath will have. If you approve, click the "Authorize" button:
After this step, you will be redirected back to your Appointment Settings page with a success message displayed, letting you know that you have successfully linked your Zoom account to your FlightPath profile.
Trouble?
At Step Three, you may instead see a button that says "Request Pre-Approval". This means that your organization does not allow you to install Zoom marketplace apps by default. Your campus Zoom admin needs to approve FlightPath Academics for you, or for everyone in your organization.
Clicking that button will send an email to your campus Zoom administrator to approve your user account only. Or, they can pre-approve everyone in your organization all at once.
Zoom has a link to their instructions here: